Ashley's Cafe
because we eat at home
Roasted Radishes
I’ve never liked radishes much. I wasn’t fond of their “bite”, but I would eat small slivers occasionally. It was never something I’d willingly buy – until I kept seeing raves about eating them roasted on the “THM Beginners” Facebook page.
Review after review praised the flavor and texture, with many ladies saying they reminded them of potatoes. Potatoes? Really? This I had to try for myself!
On my next trip to the grocery store, I bought a bag of radishes. Score one point for them being rather inexpensive. One bag didn’t look like much, but since it was my first time to cook them and I didn’t want to end up with a lot of waste just in case we didn’t like them, I decided against getting two of them.
After a day or two of leaving them alone in the veggie drawer of my refrigerator, I decided to just make them and see what all the fuss was about. The recipe was basic and simple, and I couldn’t wait to try one when they came out of the oven. After they had a little time to cool down, I popped one into my mouth.
Oh. My. Goodness. It was so good! It was soft and sweet and there was no “bite” to it. I wasn’t sure what it reminded me of, but it wasn’t a potato. I had another. And another. I made myself stop because I wanted to be sure there were enough to share with the guys – and for me to still have a full serving.
The boys looked at them and asked what they were. I didn’t want to tell them until after they had tasted them. Like me, they’re not fans of raw radishes. I told them to try a bite first, then I’d tell them. They loved them and were pleasantly surprised to learn they were radishes. They ate every bit I had put on their plates!
I must confess that my husband didn’t like them. Then again, he loves raw radishes and he just couldn’t wrap his mind around the different taste and texture. I don’t think he thought they were bad, just very different. I told him that whenever I cooked these in the future, I’d leave some raw ones out for him – for which he was grateful.
For those of you following the THM eating plan or watching your glycemic index, radishes are non-starchy vegetables with a low sugar content. (I was surprised about that since they are a root vegetable.) Cooked this way, they are an S.
Roasted Radishes
- 1 bag of radishes (or fresh ones from the garden)
- Olive or coconut oil
- Salt and pepper to taste
Preheat oven to 425 degrees.
Wash and dry radishes and slice off ends; cut into quarters. Toss with oil and seasonings.
Place radishes in a single layer on a baking tray. Bake for 20-25 minutes or until soft, stirring around about halfway through cooking time.
Serves 4.
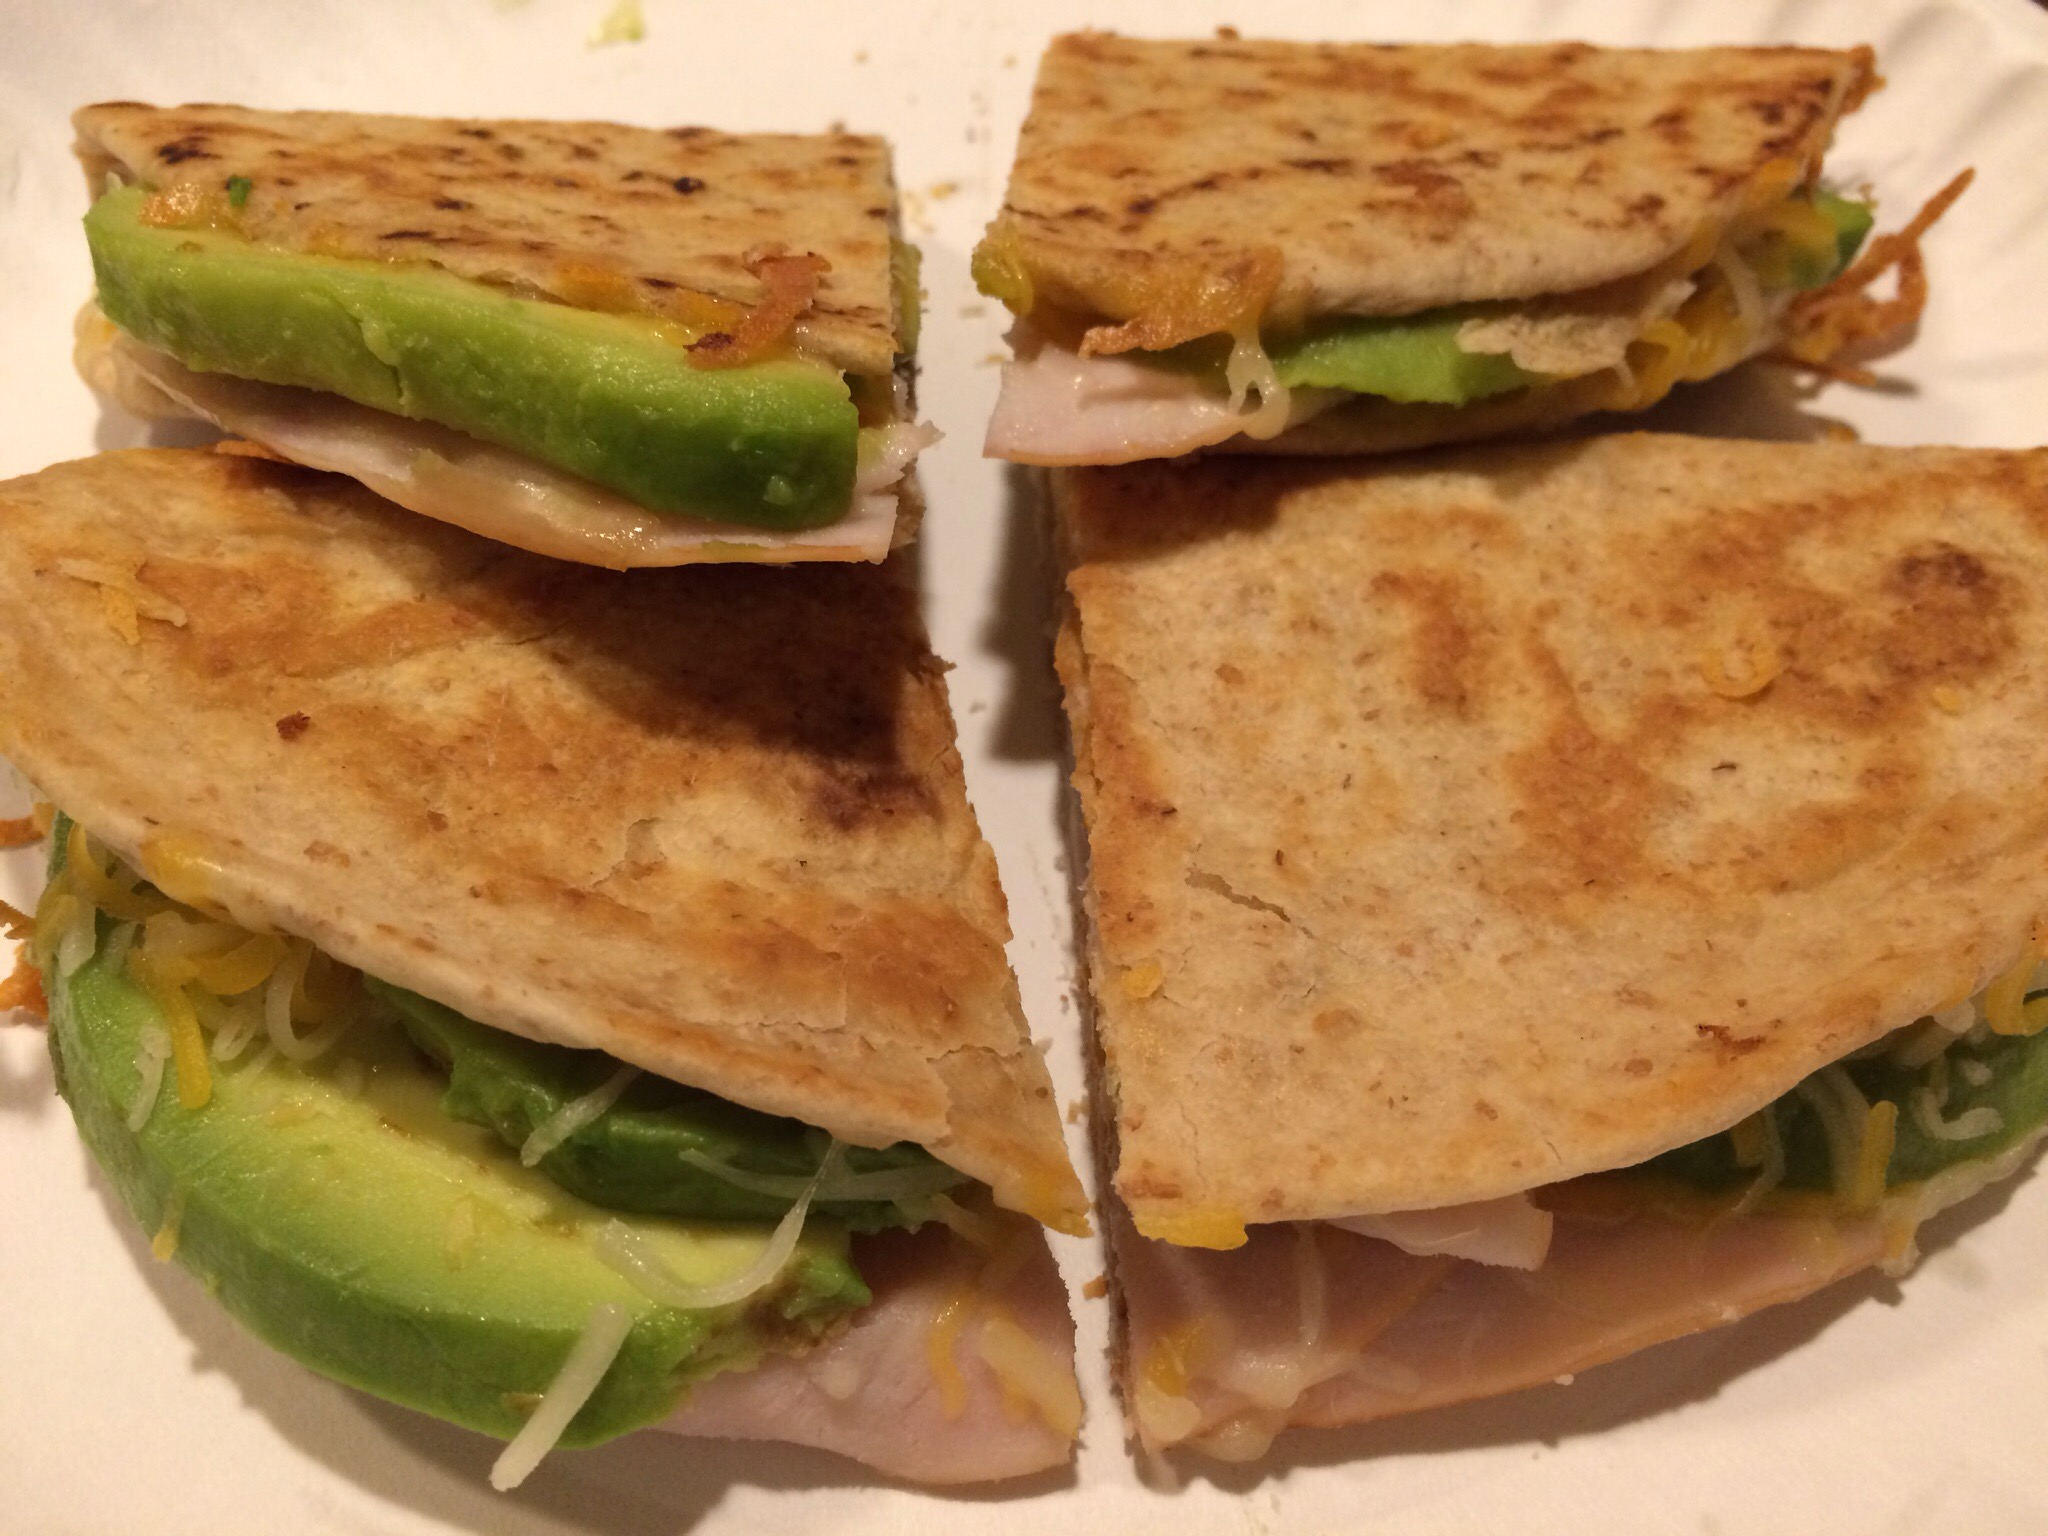
Avocado & Bacon Quesadillas
I’ve started a new lifestyle: following the Trim Healthy Mama eating plan. Over the past 4 months, I’ve lost allllmooooost 20 pounds. I’m so close! Then there are 15 more to lose after that. I can do it!
One thing I love about the plan is that I can still eat real food! I don’t have to buy special meals (though there are some special ingredients here and there for certain recipes) and I’m not limited to only a handful of ingredients. The main thing is being sure what I eat comes from one primary fuel source, either fats (S for “satisfying”) or carbs (E for “energizing”).
These quesadillas are an S meal because of the fats in the butter, the cheese, and the avocado. The two whole wheat low carb tortilla add a total of 6 net carbs, so I’m in “safe” territory. They’re quick and easy, and they’re delicious! They got 4/4 thumbs up here, but it was agreed that we need to add bacon next time.
Avocado Quesadillas (2 servings; double or triple as needed)
- 4-6 low carb whole wheat tortillas
- Butter
- Shredded Colby Jack cheese
- 8 slices deli turkey breast
- 1 avocado, thinly sliced
- 8 slices bacon, cooked and drained (crumble if desired)
Heat skillet over medium heat. Butter one side of tortilla and place butter side down in hot skillet. On one half of the tortilla, layer cheese, turkey, avocado, bacon, and additional cheese. Fold empty half of tortilla over the filled side, then flip over. Grill on each side until golden brown.
Pepperoni Chips
I’m not a fan of pepperoni, mainly because of all the grease pools it creates. But when I saw a picture of Pepperoni Chips on Pinterest, they looked really good. Dry. Not the least bit greasy. I finally tried them – and they were great! Four thumbs up from the four of us! And a bonus: they’re an acceptable THM (S) food!
Now I occasionally make them for snacks, as part of the boys’ lunch, or as a side to some meals. They’re quick, easy, and much healthier than eating them straight from the package (yuck!) or sitting in a pool of grease on a slice of pizza.
Ingredients: pepperoni
Cover the top of a microwave-safe plate with a double layer of paper towels. Place one layer of pepperoni slices on top of paper towels and cover with another paper towel.

Microwave on HIGH for one minute. Let cool before eating.
They’re great plain, with crackers and cheese, with pretzels and marinara, etc.

Black Bean Enchilada Casserole
We love Tex-Mex! This was one of the food choices at a night of basketball games at my son’s school. Once I tasted it, I knew I had to have the recipe. As it turned out, a friend of mine had made the restaurant pan full and donated it to the concession stand. A few months later, she made pans of it for me and two other friends – and she included the recipe. It has quickly become a family favorite! I’ve tweaked things or added an extra ingredient here and there, as is my habit, but it’s always great.

Olive oil
1 pkg. ground turkey (or a pound of ground beef)
1 large onion, chopped
1 jalapeño pepper, chopped (optional)
1 pkg. taco seasoning mix (or make the homemade version)
1/4 c. water
1 can Ro-Tel (I purée ours and add a little extra water.)
1 can black beans, rinsed and drained
1 can Mexicorn or whole kernel corn, drained
1 can black olives, rinsed and sliced (optional)
8 corn tortillas, cut in half
1/3 block of Velveeta, sliced into thin slabs
2 c. shredded Colby jack cheese
Heat oil in a large skillet; begin sautéing onion and peppers. Add ground meat and brown until fully cooked; drain. Return to skillet and add taco seasoning mix and water. Bring to a boil, then stir in Ro-Tel, beans, corn, and olives. Remove from heat.
Preheat oven to 350 degrees.
Place 8 tortilla halves in bottom of 9×13 baking dish. Top with half of the meat mixture, then lay slabs of Velveeta on top of that. Layer 8 remaining tortilla halves and the rest of the meat mixture, then top with shredded cheese.

Bake for 20 minutes or until cheese is melted.
*Salsa is a good substitute for the Ro-Tel, as I found out when I spilled my only can all over my kitchen floor, among other things…
*If you have fresh corn on the cob, cut the kernels off the ears and sauté them in a skillet with some onions and peppers in place of the canned corn.
Taco Seasoning Mix
Every once in a while I want to cook something that requires taco seasoning mix, but I don’t always have some on hand. I do have quite an extensive spice cabinet, though, and all the ingredients from this Pinterest find are in there. I’ve used this recipe for tacos, seasoning for a casserole, and in taco soup. It’s delicious and healthy – no MSG or added chemicals. Now that I’ve used it enough and have determined that it’s what I want to use from here on out, I think I might make a batch of it to store in my pantry for quick use whoever I need it. If using from a big batch of the mix, use 3 Tablespoons per pound of ground meat.
I haven’t changed any ingredients from the original recipe, but I have decreased the amount of salt and I’ve ordered them more to my “OCD” liking.
1 Tablespoon chili powder
1 1/2 teaspoons ground cumin
3/4 teaspoon table salt
1/2 teaspoon black pepper
1/2 teaspoon paprika
1/4 teaspoon garlic powder
1/4 teaspoon onion powder
1/4 teaspoon dried oregano
a pinch of cayenne pepper
Mix all ingredients well, then add to meat, sauce, or whatever you’re cooking. If adding to ground meat, add 1/4 cup water and simmer for 8-10 minutes.
Skillet Potatoes with Sausage
I always like one-dish skillet meals that are quick and easy. My mom shared a version of this recipe with me, and it’s now a new family favorite!

olive oil
4-5 medium baking potatoes, peeled and cut into bite-size pieces
2 medium onions, cut into wedges
8 oz. mushrooms, washed, dried, and quartered
1 lb. link sausage, sliced lengthwise and cut into bite-size pieces
McCormick’s Montreal Steak Seasoning, to taste
Heat oil in a large skillet over medium high heat. Brown potatoes, stirring frequently to prevent burning. Add onion and continue stirring until onions are clear. Stir in mushrooms and sausage. Reduce heat to medium low and cover skillet. Cook until sausage is browned, stirring occasionally. Season to taste, then serve.
*My mom also uses sliced carrots in her recipe. She uses garlic pepper instead of the Montreal Steak Seasoning. Use whatever veggies you like: sweet potatoes, asparagus, green beans, squash, etc. I think some fresh spinach cooked into it would be a nice touch.
Soft Pretzels
We love soft pretzels, but I thought they’d be difficult to make. A friend of mine makes them often, and after snacking on a few of hers, I decided I wanted to try them for myself. The recipe in my bread machine booklet called for shortening, which it don’t use, so I was put off again. Finally I read up on substitutions and found I could use butter instead. I couldn’t believe how easy – and delicious they turned out! Now they’re a family favorite. I can’t wait to have them this winter along with tomato soup, chili, gumbo, etc.

1 c. warm water (90-100 degrees)
3 c. bread flour
1 Tbsp. dry milk
2 Tbsp. sugar
3/4 tsp. salt
1 Tbsp. butter
1 tsp. bread machine or fast rise yeast
–or–
1 1/2 tsp. active dry yeast
1 egg white, slightly beaten
coarse salt
Add warm water to bread machine pan. Add bread flour, dry milk, sugar, and salt to pan; tap pan to settle dry ingredients, then level. Cut butter into small pieces and evenly distribute in the corners of the bread pan. Add yeast to center of pan.
Lock pan into bread maker and program for DOUGH; start machine.
When dough has finished, remove from pan and knead on a floured surface for 1 minute. Roll out into a rectangle, about 1/2-inch thick. Cut dough into 16 equal pieces. Shape each piece into a ball or a pretzel. (For a pretzel shape, roll each piece into a long rope, then cross the ends and twist them twice. Fold ends across to opposite side and tuck under.
Place pretzels on greased baking sheet, cover, and let rise in a warm, draft-free place for 30-50 minutes until slightly risen.
Preheat oven to 375 degrees. Brush pretzels with egg whites, then sprinkle with coarse salt. Bake for 20-25 minutes or until golden brown. Place on rack to cool.
Serve as a bread with soups or as a snack with dipping sauces. We like homemade marinara sauce, honey mustard, or warm queso.
*For chewy pretzels, bring 2 quarts of water to a boil in a large pot. Add 1 Tbsp. of salt to dissolve. Reduce heat to simmer and place 2 to 3 pretzels in hot water. Simmer one minute on each side. Remove with a slotted spoon, drain, and place on grease baking sheet. Brush with egg white, sprinkle with coarse salt, and bake as directed above.
Inside-Out German Chocolate Cake
Oh. My. Goodness. This cake is so moist and so easy! And you don’t have to worry about frosting it because the frosting is mixed into the cake batter.
1 box chocolate cake mix
1 can coconut pecan frosting
Ingredients listed on box
*Only use half the oil listed in the box instructions!
Preheat oven to 350 degrees. Grease and flour a Bundt pan.
Prepare cake mix as directed on box, but use only half of the oil (or applesauce) as instructed. Add the can of frosting to the batter and mix in well.
Pour into prepared pan and bake for one hour or until cake tests for doneness.
Remove from oven and cool 15 minutes on a wire rack before inverting cake pan and removing cake.
*Feel free to try other cake flavor and frosting combinations. I’ve tried a few others, but the German chocolate variety is my favorite.
Helpful hint: when preparing cake pan, use dry cake mix instead of flour. It gets absorbed into the cake and doesn’t leave a white residue.
Cheesy Baked Zucchini

I like zucchini, but it’s been a struggle to find a way to cook it that the boys like – other than fried. They don’t like it sautéed or stir-fried. One of them likes it in zucchini bread, but we can only eat so much of that… I’ve pinned several zucchini recipes on Pinterest, but this is the first one I’ve gotten around to trying.
I wasn’t sure what they’d think of it, and I was pleasantly surprised when they both said they liked it and wanted more. I kept going back for more myself!
I didn’t follow the recipe as written. In fact, I made several changes to it. I don’t know that I’d change anything other than the thickness of the zucchini slices. Thinner slices would cook more quickly.
1 onion, diced
2 cloves garlic, minced
olive oil
3-4 zucchini, thinly sliced
2 Tbsp. chopped fresh basil
1/2 c. shredded Parmesan cheese
1 1/2 c. shredded Italian blend cheese, divided
Preheat oven to 350 degrees and lightly grease a 9×9 baking dish.
Sauté onion in olive oil; add garlic and sauté one additional minute. Remove from heat.
In a large mixing bowl, combine onion and garlic mixture, zucchini, basil, Parmesan cheese, and 1 cup of Italian blend cheese. Mix well and pour into baking dish.
Bake uncovered for 40 minutes, then top with remaining Italian blend cheese. Return to oven and bake an additional 10 minutes.
*In order to speed up the cooking time, I covered the zucchini for part of the baking time. I think that might have held a lot of the moisture in, which caused the final product to be very watery. Then again, it may just be the nature of the dish. I’ll know more after I make this a second time, which will be soon!
Cilantro Lime Rice
We love Chipotle, but it can get expensive for two adults, one child, and one bottomless pit 13-year-old (well, as of this Wednesday…). While browsing Pinterest, I came across a taste-alike recipe for their rice. I’m not a big fan of cilantro, but in small quantities, it adds just the right flavor.
The original recipe I followed must have a stronger flavor. I doubled the rice and increased the water, cut back on the oil, and used a little less lime juice. Here’s my version:
2 cups instant brown rice (original recipe: 1 cup)
1 3/4 cups water (per package instructions; original recipe: 1 cup)
2 teaspoons olive oil, divided (original recipe: 3 Tablespoons, divided)
3 Tablespoons chopped cilantro
juice from 1/2 lime (original recipe: juice from 3/4 lime)
Bring water and 1 teaspoon of oil to a boil. Add rice. Cook according to package instructions.
While rice is cooking, mix remaining teaspoon of oil with cilantro and lime juice in a small bowl. Stir into hot rice.
Serve as a side dish or as a taco or burrito filling.
 I mixed in one can of black beans (rinsed and drained) and one can of whole kernel corn with red and green peppers, heated it in the microwave for a minute and a half, and served as a taco filling with some Roasted Tomatillo Avocado Salsa.
